Desserts
Classic Tiramisu Cake
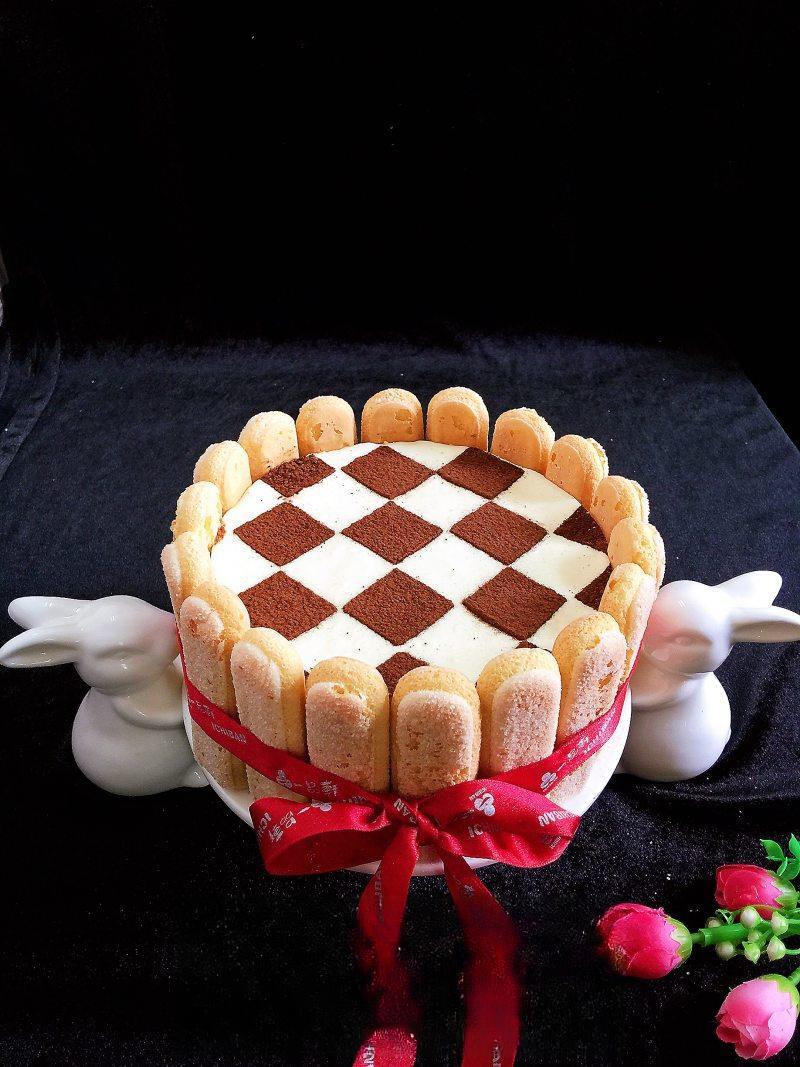
This elegant no-bake tiramisu combines layers of coffee-soaked ladyfingers with a rich mascarpone cream filling. Finished with a cocoa powder pattern and decorative ladyfingers, it makes a beautiful dessert for birthdays, celebrations, or special occasions.
- Total
- 4 hours
Quick Recipe Summary
- Cuisine
- Chinese
- Category
- Desserts
- Method
- Baking
- Total Time
- 4 hours
- Difficulty
- Intermediate
- Main Ingredient
- Mascarpone Cheese
About This Recipe
This elegant no-bake tiramisu combines layers of coffee-soaked ladyfingers with a rich mascarpone cream filling. Finished with a cocoa powder pattern and decorative ladyfingers, it makes a beautiful dessert for birthdays, celebrations, or special occasions.
Why You'll Love This Recipe
- Written with clear home-cooking steps so the process is easier to follow from start to finish.
- Breaks the method into manageable steps instead of assuming you already know the technique.
- Includes clear preparation cues that help with texture and consistency.
- Gives the dish a clear sweet flavor profile without making the method feel complicated.
- Useful as a reference recipe because the steps explain both what to do and what to watch for.
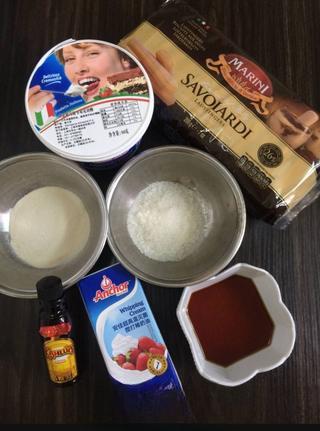
Ingredients
- 250 g Mascarpone Cheese
- 250 g Heavy Cream
- 1 package Ladyfingers
- 30 g Sugar
- 25 g Coffee Liqueur
- 10 g Gelatin Powder
- 15 g Cold Water
- 2 tablespoons Cocoa Powder
Ingredient Notes
These notes explain the role of the main ingredients so the recipe is easier to adjust.
Mascarpone Cheese
This ingredient helps define the flavor, texture, or structure of the dish.
Heavy Cream
This ingredient helps define the flavor, texture, or structure of the dish.
package Ladyfingers
This ingredient helps define the flavor, texture, or structure of the dish.
Sugar
A small amount of sugar rounds out saltiness and helps create a more balanced finish.
Step-by-Step Instructions
Step 1
Prepare all ingredients and allow the mascarpone cheese to come to room temperature.
Step 2
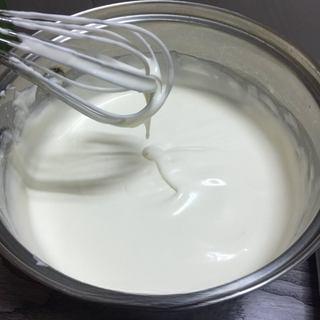
Whisk the mascarpone until smooth and creamy.

Step 3
Add sugar to the heavy cream and whip until it reaches soft peaks, remaining smooth and slightly pourable.
Step 4
Fold the whipped cream into the mascarpone until fully combined.
Step 5
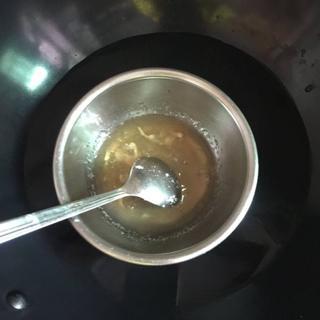
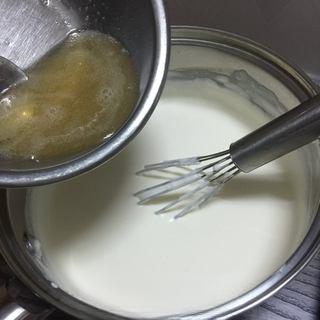
Bloom the gelatin in cold water, then gently heat until completely dissolved.
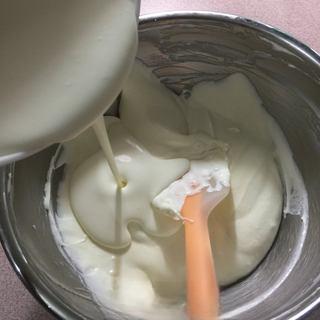
Step 6
Mix the dissolved gelatin into the mascarpone cream mixture until smooth.
Step 7
Quickly dip each ladyfinger into the coffee liqueur or coffee mixture, ensuring they are moistened but not soggy.
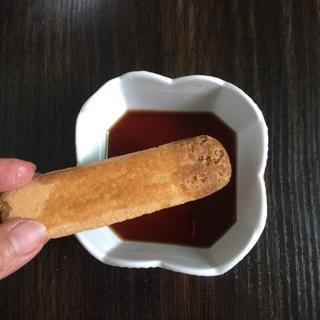
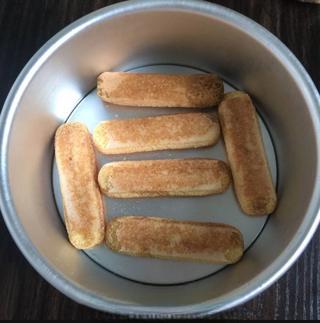
Step 8
Arrange a layer of soaked ladyfingers across the bottom of a 6-inch cake pan.
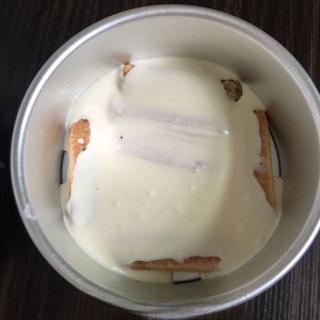
Step 9
Spread half of the mascarpone cream mixture evenly over the ladyfingers.
Step 10
Add a second layer of soaked ladyfingers.
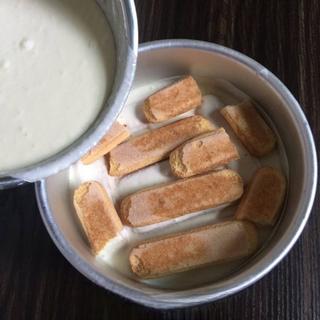
Step 11
Cover with the remaining mascarpone cream and smooth the surface.
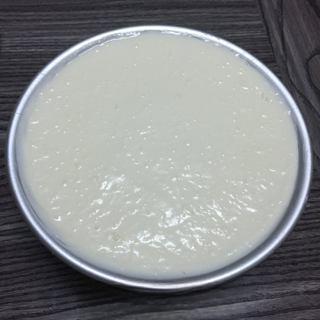
Step 12
Refrigerate for at least 3 hours, or until fully set.
Step 13
Carefully remove the cake from the mold. Warm the outside of the pan slightly if needed to help release the cake.
Step 14
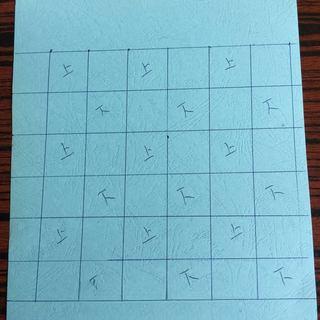
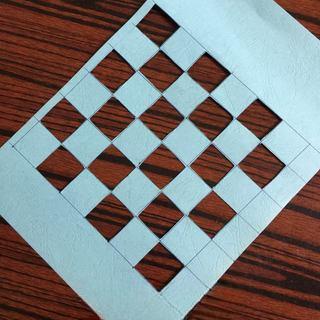
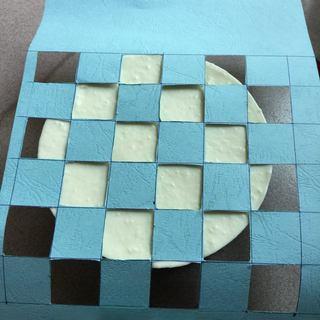
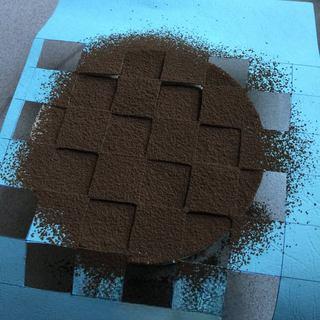
Place a decorative stencil or paper pattern over the top and dust evenly with cocoa powder.

Step 15
Remove the stencil to reveal the cocoa pattern.
Step 16
Decorate the sides with additional ladyfingers and tie with a ribbon if desired before serving.
Cooking Tips
- Do not soak the ladyfingers for too long or they may become mushy.
- Use room-temperature mascarpone to prevent lumps.
- Chill the cake thoroughly before unmolding for clean layers.
- Freshly brewed espresso can be used in place of coffee liqueur.
- Dust cocoa powder just before serving for the best appearance.
Serving Suggestions
- Serve it with steamed rice when you want a simple Chinese home-cooked meal.
- Pair it with one vegetable dish and one soup or tofu dish for a balanced Chinese meal.
- Use the recipe card below when you want a quick cooking reference after reading the full notes.
Recipe Card
This elegant no-bake tiramisu combines layers of coffee-soaked ladyfingers with a rich mascarpone cream filling. Finished with a cocoa powder pattern and decorative ladyfingers, it makes a beautiful dessert for birthdays, celebrations, or special occasions.
Ingredients
- 250 g Mascarpone Cheese
- 250 g Heavy Cream
- 1 package Ladyfingers
- 30 g Sugar
- 25 g Coffee Liqueur
- 10 g Gelatin Powder
- 15 g Cold Water
- 2 tablespoons Cocoa Powder
Method
- Prepare all ingredients and allow the mascarpone cheese to come to room temperature.
- Whisk the mascarpone until smooth and creamy.
- Add sugar to the heavy cream and whip until it reaches soft peaks, remaining smooth and slightly pourable.
- Fold the whipped cream into the mascarpone until fully combined.
- Bloom the gelatin in cold water, then gently heat until completely dissolved.
- Mix the dissolved gelatin into the mascarpone cream mixture until smooth.
- Quickly dip each ladyfinger into the coffee liqueur or coffee mixture, ensuring they are moistened but not soggy.
- Arrange a layer of soaked ladyfingers across the bottom of a 6-inch cake pan.
- Spread half of the mascarpone cream mixture evenly over the ladyfingers.
- Add a second layer of soaked ladyfingers.
- Cover with the remaining mascarpone cream and smooth the surface.
- Refrigerate for at least 3 hours, or until fully set.
- Carefully remove the cake from the mold. Warm the outside of the pan slightly if needed to help release the cake.
- Place a decorative stencil or paper pattern over the top and dust evenly with cocoa powder.
- Remove the stencil to reveal the cocoa pattern.
- Decorate the sides with additional ladyfingers and tie with a ribbon if desired before serving.
More Chinese Recipe Guides
Related Recipes
Keep exploring Chinese home cooking with similar recipes and beginner-friendly dishes from the collection.